I was the center of attention last night which is a role I am never very comfortable with. I didn't have to give a speech or have the garden all weeded and ready for a tour, or get all gussied up.
All I had to was sleep.
And, hopefully, snore. I was hoping I would snore like I do at home, with the addition of holding my breath thrown in, just a little. It always makes Carl uneasy when I stop breathing at night. Funny, it never bothered me, because I did not believe my snoring was all that bad.
That is, until I borrowed a small tape recorder from Joel and taped myself sleeping (or I should say, trying to sleep.) I was amazed. It sounded like I was fighting for my life half the night. The noises emanating from my throat and nasal passages were anything but ladylike; I sounded like an amplified foghorn on steroids. And poor Carl! How could he sleep through this steadily increasing racket night after night for the last 32 years? No wonder he's exhausted half the time.
So, in my latest quest to find out what could be causing some of my weird health symptoms, I went in to the hospital last night for a 'sleep study'. Ironically, the fact I may have problems sleeping was brought to my attention by a rheumatologist I was sent to see by mistake, as I do not have rheumatoid arthritis, apparently. Well, that's good news, truly it is, (turns out I have plain ol' garden variety arthritis, for those of you keeping score) but the rheumatologist wanted to know what my problem is, and I assured him I wish I knew. But as I was going through my symptoms of this, that, and the next thing, when I got to my restless legs problem, he stopped me dead in my tracks, "How do you sleep at night? Do you snore?"
I said, "No, not really," only to see Carl's head nodding up and down in an emphatic YES she does! motion. Oh, Carl, really.........must you embarrass me? Ok, well, maybe I DO snore a little, I admitted.
"Does she hold her breath sometimes?" the doctor asked.
I glanced sidelong at my traitorous spouse, and was treated to another series of whiplash inducing head-nodding.
"You probably have Sleep Apnea," the doctor declared. "You should go in for a sleep study."
So, I was referred to a sleep specialist next. The sleep doctor was a very thorough man, who after listening to Carl's horror stories of what it takes to get through a night of sleeping with a snoring banshee, scheduled me for a sleep study in about three weeks. The three weeks was up last night.
For a week prior to going in, I had to keep a Sleep Diary, noting whether I napped during the day (nope, never do) to what time I went to bed, how many times I woke up in the middle of the night, how long I was awake, and what time did I finally get up for the day, and how did I feel upon awakening, refreshed or crummy? Turns out, sleep apnea can worsen high blood pressure, bring on morning headaches, raise cholesterol, cause aches and pains of fibromyalgia, raise insulin resistance, and is not a good thing for your heart, causing it to work much harder than needs be. And of course, lack of sleep limits a person's ability to be productive, slows reflexes and is just as bad or worse than driving drunk. Many accidents are caused by exhausted people dozing off behind the wheel.
So, at 7:30PM Monday night, I reported for Sleep Duty. Sounds so easy, doesn't it? Just show up, crawl into a comfy bed and sleep. Oh, but if there's one thing that is consistent about me, it is my ability to make easy things hard. At the Sleep Lab I was told to get into my jammies and wait for the technician to come back in and get me ready for the test.
The nice lady came into the room with all sorts of gadgets and gizmos on a cart along with a portable air compressor. (The compressor threw me a bit, I was wondering what we were going to need to inflate?) First she took a tape measure and started measuring my head from ear to ear and from nose to base of the neck, making little marks with a china marking pencil at strategic intervals. Then she had to rough up the skin on my scalp a little and apply some glue (smelled like the stuff used for model airplane kits) to my head in dabs on the marks. After the glue was on my skin for a little while, she then stuck patches with electrodes and long wires in them into the glue and turned on the air compressor to speed the drying process. I'm not sure how many wires I had on my head, but I know there was more than ten on my skull, and three on my chin, two by my eyes, some on my forehead, two on my legs, a stretchy belt under my arms and around my waist and an oxygen sensor on my left-hand ring finger. Then I was given a box to wear around my neck until bedtime with all the wires dangling out of it, which made me a Portable Patient. I could sit up and watch TV or read or do what I wanted until bedtime.
I watched cable TV for an hour (but was amazed there were so many commercials? We don't have cable here at home and now I'm not jealous any more) and then I left my door open a crack which is the signal I am ready to Sleep! It was 10:30PM.
My friendly tech came in, plugged me into all the bells and whistles, and put an oxygen sensor hose-like thing in my nostrils, taped it to my face to hold it in place and then left the room. She then spoke to me through the intercom system and told me to open my eyes, close my eyes, roll my eyes, blink five times, breathe through my nose quickly, then slowly, the same with my mouth, stick out my tongue, flex my feet, and finally, make a fake snoring sound three times.
"Ok, Karen, any questions? If not, you are all set. I will monitor your breathing, heart rate, and oxygen levels from the next room. The infrared camera will record your movements. We will be able to see you all night long, so if you have any problems, need more blankets, have to use the restroom or any other issues, just let me know. You can go to sleep now."
Ok...Let's Do This! Let the sleeping commence! I was ready and willing..........but unfortunately, not able.
I kept thinking, ok, sleep. That's all you have to do. Sleep. Come on. You can do this. Sleep. Ok, roll over, maybe on my left side it will be better. Uh, five minutes later, nope, no better....roll over to the right side.....um...ok, just hold still, keep breathing, and relax.....Sleep. SLEEP....SLEEP! Ooops, now I've unplugged something.......drat......here comes the nice technician to plug me back in. I asked for another blanket, as my feet were like two blocks of ice for some reason.....ahhhh......that's better. Ok, let's get serious here, we can do this. Think pleasant thoughts. All I have to do is fall asleep, come on, I can do this.
But I couldn't.
Performance anxiety over sleeping? Good grief. My restless legs were in top form, as restless as ever and aching to boot. I just could not get my legs to stop hurting. And of course, trying to roll over without dislodging all the wires and hoses was a challenge, too.
Finally, the nice technician lady came in with a sleeping pill for me to take. After some time, I guess I must have dozed off, but I don't remember when. At some point I woke up again with my legs aching worse than ever and heard my technician say over the intercom, "Ok, Karen, we are going to terminate the Sleep Study now."
What? Oh, no! I had failed...I didn't sleep at all! Now what? Nobody will believe me now. I felt so sad.
The tech told me to repeat the blinking, eye rolling, breathing and fake snoring exercises for the end of the tape and that was the end of my Sleep Study. She then came into the room and proceeded to unharness me from all the wires. It was 6:30AM; I didn't know it was that late; I really couldn't believe I'd slept at all.
I told her I'd failed, and she said, no, I hadn't failed, I had indeed slept and I certainly DID snore. And she said I stopped breathing 65 times in the seven hours, but I never achieved truly deep sleep which is when she suspects I would probably have more events of sleep apnea. I know she is not the doctor and all the results have to be reviewed yet, but in her opinion, I do, indeed, have Sleep Apnea, in a rather mild form. .
Depending on what the doctor finds after looking through all the paperwork, I might have to do this all again, only this time with a CPAP machine. Or maybe he'll find my problem is too minor for treatment. You would think I'd be sad to hear a positive diagnosis, wouldn't you? But I'm not. I'm not sure where this will all lead, but in the end, I hope it leads to a great night's sleep, even if I have to wear a snorkel-like device for the rest of my days.
And Poor Carl might finally get a good night's sleep too!
Waiting for the phone to ring......YAWN....sure, NOW I can sleep!
Tuesday, November 30, 2010
Monday, November 22, 2010
How This All Started, Part 15
After scurrying and hurrying to get the Dome built and the Quarry sort of finished for the June 2004 wedding and garden walk, we caught our breath for awhile. There's always a bit of a let-down for me when events are over; I guess I do my best work under pressure. When there's no deadline, I find it hard to get motivated and Carl agreed; he feels the same way. (It's the procrastination thing again.....)
Someone took this picture of Carl and I right after the June garden walk, the dome is just about done tarnishing by this time.
Well, with no deadlines in the immediately foreseeable future, we went back to work on the hill behind the Quarry, hauling in more loads of sand from up by the woods and placing rocks.
We kept working on building the hill up:
But as we worked along, we found out we were running short of rock once again. We never thought we'd go through 300 tons of stone, but we did. C did bring us six more loads, another 120 tons.
Carl had told C we wanted some very big rocks in these next six loads and wow, we got 'em...one of the rocks was so big it would not fit in the box of the dump truck. When the truck pulled into our lane, the biggest rock was perched on top of the sides of the truck. "Don't say I didn't get you big rocks this time!" C teased.
I went out and looked at the size of some of these new rocks and was intimidated. We tried to move the biggest one, but the wrecker was not capable of lifting the 10,000 pounds that Carl estimated it weighed. When we had rocks that were too big to handle with our small equipment, we would take chisels and hammers and split the rocks along their natural fault-lines or even split them against the grain to sizes we could deal with.
The biggest stone we had on this last load was one Carl did not want to break down into smaller pieces; he wanted it for a focal point. In order to be able to move the big rock from the field to the site, we decided to simply take the top seven inches off the rock in one nice, neat slab. In the picture below, Joel and Dave are working on putting chisels all the way around the stone, tapping them in a little at a time. You don't want to rush this job, because then the rock may split the opposite way...we were lucky with this one, it came off in one piece.
After we had it split, we hooked the top quarter to the wrecker and hauled it up to waterfall hill and then went back for the rest of the rock. Even with a good 2000 pounds off the top, the rock still weighed more than the 574 could pull with chains; the tractor's tires would only spin as the load was too heavy.
So, our next idea was to hook our two tractors up to the rock together. Joel was on the 574, pulling the rock, and I was on the Super H, pushing it from behind. We had to coordinate our forward speeds very closely, or neither of us could do a thing. If I pushed before he was pulling, we both just sat and spun our wheels.
There we go, in the picture above, around the corner to the quarry site. After we got it into position, which took the better part of an entire afternoon....since we had to use wooden blocks and crowbars to guide it into place, we could then put the top back on. Once the top was seated back on the bottom piece, you can't really tell where the split is unless you know where to look. It fit back together perfectly. The picture below was taken just before dark.
As you can see from the picture, we have a lot of trees to work around, too, which caused problems at times. You can't drive the tractors and wrecker where you need them to go because of the trees being in the way, so many of the rocks were put in by hand after getting them as close as possible.
We continued building the hill with the new rock and finally finished up with the north side of the waterfall hill. By now, it was September 2004. This is where the story is out of sequence........you'll have to flashback to my earlier post about the windmill, Part 12, because on Labor Day, September 2004, we put the windmill head up.
Ok, the windmill is now up...........We decided to take a little break from all the work for a bit and go on a road trip to southern Wisconsin. Of course, our trips are always very exciting; some people go to Disneyland or even Wisconsin Dells, but not us. We went to a much more sophisticated tourist attraction, Rock in the House. No, not House on the Rock, which is a completely different tourist attraction. We went to Rock in the House, in Fountain City, Wisconsin. Click on the link to see all about it: Rock in the House
The people who lived in the house were luckily absent when this 55 ton rock came flying down the cliff and crashed into their bedroom. No one was hurt......but can you imagine walking into your bedroom and seeing this?? We love rocks, but I guess even I'd draw the line at one breaking and entering the house.
Dave wasn't really a big fan of our vacations.........I wonder why? (Poor kid.) Oh, we did see other things besides rocks....there was Devil's Lake State Park, uh...ok, there's rocks there too, and of course we toured through many cemeteries, looking at polished rocks..........uh.....ok...never mind.
After we got back from vacation it was mid-September and time to get cracking again. We were done with the north side of the quarry, but now we had a bunch of rocks left over. Can't let good rocks go to waste. Hmmmmmmmmm.... but what could we do next?
Time to CAC.......Create A Crisis. Here we go again. I decided I didn't like the barn where it was sitting. Yes, we had moved the barn once already to get it out of the way of the Quarry construction. But where the barn was placed now was causing problems with photography, it seemed as if every picture taken from whatever angle had the barn in it. We had two more wedding parties come for pictures in 2004, and no matter where they stood, the barn was in the picture.
In the aerial picture, above, the north waterfall hill addition is in the lower left-hand corner. The barn is to the west of the quarry itself and to the north of the Formal Garden.
From every angle, there was definitely a barn in the picture. We decided it was time to move the barn next. If there was ever a difficult move to make, it was moving the barn out in one piece again. Especially now that we had the quarry right in front of it! We couldn't go forward with the building because there wasn't enough room, and to tell the truth, there are no pictures whatsoever of the move itself. What we had to do was saw down several trees behind the barn and take it out backwards. We put the same home-made trailer under it as we did the first time:


Now that the barn was gone, we were free to put in the next part of the garden...what we call the Escarpment, which is basically just a free-standing stone formation. We thought it would tie into the Quarry and make it look more natural; plus we had so many nice stones leftover. At least we thought we did....
When Carl got home from work that night, he was so happy, hey, we all were......there's just something about new stones to play with.


Someone took this picture of Carl and I right after the June garden walk, the dome is just about done tarnishing by this time.
 |
| Where's our next crisis? We shouldn't have time to be just standing around. 2004 |
 |
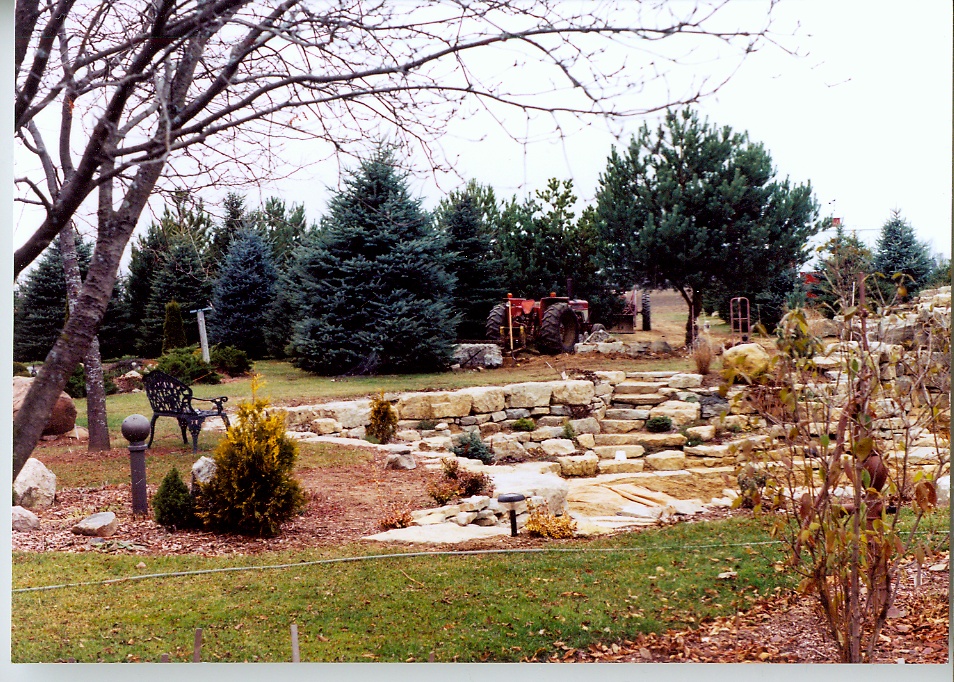
| Behind the Quarry...Joel, age 18 on tractor; David age 14 helping get a rock off the bucket. Teddy Dog in foreground. |
 |
| More dirt, more rocks, more work. |
 |
| Joel and Carl |
 |
| New rocks sorted roughly by size, July 2004. Picture taken from windmill tower. |
Carl had told C we wanted some very big rocks in these next six loads and wow, we got 'em...one of the rocks was so big it would not fit in the box of the dump truck. When the truck pulled into our lane, the biggest rock was perched on top of the sides of the truck. "Don't say I didn't get you big rocks this time!" C teased.
I went out and looked at the size of some of these new rocks and was intimidated. We tried to move the biggest one, but the wrecker was not capable of lifting the 10,000 pounds that Carl estimated it weighed. When we had rocks that were too big to handle with our small equipment, we would take chisels and hammers and split the rocks along their natural fault-lines or even split them against the grain to sizes we could deal with.
The biggest stone we had on this last load was one Carl did not want to break down into smaller pieces; he wanted it for a focal point. In order to be able to move the big rock from the field to the site, we decided to simply take the top seven inches off the rock in one nice, neat slab. In the picture below, Joel and Dave are working on putting chisels all the way around the stone, tapping them in a little at a time. You don't want to rush this job, because then the rock may split the opposite way...we were lucky with this one, it came off in one piece.
 |
| If you look closely, you can see the chisels sticking out all the way around the stone, about six inches down. Dave & Joel, July 2004 |
After we had it split, we hooked the top quarter to the wrecker and hauled it up to waterfall hill and then went back for the rest of the rock. Even with a good 2000 pounds off the top, the rock still weighed more than the 574 could pull with chains; the tractor's tires would only spin as the load was too heavy.
So, our next idea was to hook our two tractors up to the rock together. Joel was on the 574, pulling the rock, and I was on the Super H, pushing it from behind. We had to coordinate our forward speeds very closely, or neither of us could do a thing. If I pushed before he was pulling, we both just sat and spun our wheels.
 |
| July 2004 |
 |
| Joel, on tractor, and Carl, putting the rock back together, this is the start of the north side of the Waterfall hill. July 2004. |
We continued building the hill with the new rock and finally finished up with the north side of the waterfall hill. By now, it was September 2004. This is where the story is out of sequence........you'll have to flashback to my earlier post about the windmill, Part 12, because on Labor Day, September 2004, we put the windmill head up.
 |
| Rerun picture of Aermotor installation, September 2004. (see Part 12) |
 | ||||||||||||||||
| There we are: Joel, Dave (looking terrified that another huge rock will come catapulting down the hill to kill us all) and me, hiding behind David, at Rock in the House, September 2004 |
Dave wasn't really a big fan of our vacations.........I wonder why? (Poor kid.) Oh, we did see other things besides rocks....there was Devil's Lake State Park, uh...ok, there's rocks there too, and of course we toured through many cemeteries, looking at polished rocks..........uh.....ok...never mind.
After we got back from vacation it was mid-September and time to get cracking again. We were done with the north side of the quarry, but now we had a bunch of rocks left over. Can't let good rocks go to waste. Hmmmmmmmmm.... but what could we do next?
Time to CAC.......Create A Crisis. Here we go again. I decided I didn't like the barn where it was sitting. Yes, we had moved the barn once already to get it out of the way of the Quarry construction. But where the barn was placed now was causing problems with photography, it seemed as if every picture taken from whatever angle had the barn in it. We had two more wedding parties come for pictures in 2004, and no matter where they stood, the barn was in the picture.
 | ||
| Joel's Aerial Windmill View 2004 |
 |
| Panoramic picture, July 2004 |
 | ||
| Rerun picture from 2001 when we moved the barn the first time. Same trailer, same people, same dumb job. |
We jacked the barn up off it's concrete slab foundation, stuffed the trailer under it and hauled it out backward. Then we picked up all the broken concrete slabs and moved them to the new location, over by the windmill. After the makeshift foundation was in place, we towed the barn to its next new home. (The poor barn was destined to remain there for a few years, until we moved it yet AGAIN in 2009. More on that to come...suffice it to say, Joel is not a fan of my barn-moving requests.)
Here is the barn before the move:

And below, is how it looked after the move.
Though it is hard to see, the barn in it's new setting is near the middle of the right-hand side of the picture above.
 |
| Aerial shot, November 2004--barn gone and start of the escarpment on right. |
And here is the start of the Next Thing.......the Escarpment:
We got about this far, as seen in the picture above, before we realized we were running out of stone once again! I ever so cautiously called C, gee, this was twice in one year.....and asked him if he could maybe, sort of, um, please? get us some more rock? Loading stone this size is not easy on anyone's equipment and even though his machinery was more than big enough to handle the job, the stone wears out teeth on buckets really fast, too. (He is such a good sport.)
Luckily for us, he wasn't too busy and agreed to go to the quarry again. This time, C hired a rock hauling semi-tractor trailer to bring in the stone. Oh, what a difference it was seeing this rock come in!
 |
| We've hit the big time now, it's a semi!! November 2004 |
 |
| The nice big semi brought us six more loads |
Joel stayed home from school that morning just to see the first load tipped out of the truck. The earth definitely moved again.
 |
| Heads up! Rockslide! |
 | ||||
| In this picture, you can see the box much better...this is what is known as a 'rock box'...the bottom is reinforced and the side are rounded so rocks come out more easily without getting wedged in the truck. |
 |
| Carl, age 46, outstanding on one of the six piles of new rock. November 2004 |

Once again, while the guys were at work and school, I was out in the field, sorting stones by size into pallets and tossing the smaller stuff into the trailer. I had no need for extra exercise while doing this sort of work; though I have never been thin, there's something about throwing rocks around all day that builds muscle. (I need to get back to throwing rocks!) When Carl and Joel came home from work and school, we went back to work placing stone for the Escarpment.
 |
| Late November 2004. As far as we would get with the Escarpment. |
Finally, the weather started turning colder again, it was late November and time to quit for the season once more.

Time to head into the house and get ready for Christmas 2004.
Stay tuned for what happened in 2005.
Saturday, November 20, 2010
'Tis the Season
I woke up to the sound of a shotgun going off this morning. "Oh," I groaned, "Here we go again." We will be living in a mini-war zone for the next ten days. The Gun Deer Season is now officially open.
I have nothing against hunting, don't get me wrong.
What I am against is getting shot.
The woods surrounding us are alive with hunters at times. Hunters who are anxious to bag the big buck.
I am big, but I am not a buck and I'm not real partial to being bagged.
Sometimes, the amount of gunfire is amazing...they get a deer on the run and the bullets are ricocheting all over the place, it sounds like we are living in a first-person shooter video game. It is time to break out my incredibly fashionable Blaze Orange Jacket again, which of course, affords me all sorts of protection from overzealous hunters who thought they saw something move in the shrubbery. Is it bullet-proof? Ah, no.... We probably should spend these ten days indoors, down in the basement, actually, just to avoid the possibility of being bagged.
But I can't stay in today. I procrastinated again. Here it is, November 20, and guess what? I still have to finish planting my daffodil bulbs, wrap my apple trees with their seasonal rabbit-proof tree wrap and screen protectors and a bunch of other winter chores all while dodging bullets. Never let it be said I don't lead an exciting life.
I have often scolded our sons about putting things off when they were in school, "What do you mean you have a 200 page essay due by tomorrow morning? And you need six dozen cookies, a pirate costume and a high relief topographical map complete with a reasonable facsimile of an erupting volcano by then, too??"
I would pull out my hair followed by all the stops. And the sad part is, the project would get done. Yes, I could get all of the above done in record time if I had to. I'm wired like that...or is it weird like that? Either way.
So, where did our sons learn to procrastinate? Hmmmmmmmmmmm.................I have absolutely NO idea. It couldn't be from me and his father, now, could it? Ok, all right, I'll come clean. Both of us are notorious procrastinatoes-------oh, dear, I just glanced up and saw my spell checker dislikes the way I've spelled procrastinators.....and I've just about wet my pants giggling and convinced my son and husband (who are sitting nearby) that I am insane, by freaking out about the word procrastinatoes. A simple little typo makes such a difference. Sounds like a new vegetable, doesn't it? Isn't there a TV show about a family called the 'Incredibles'? Meet Carl & Karen here at Quarry Garden, Home of The Procrastinatoes, where we put everything off until the last minute, every day.
And taking the word in parts: 'pro' stands for something one is for...... so if I am for 'crastination' what exactly does that mean? Wikipedia says pro means 'for' and crastination means 'tomorrow'. Yup, sounds about right, I'll put that off for tomorrow.
Hey, but it's not all my fault that I didn't get everything done yet........After Daylight Saving's Time ends, the days are so impossibly short. By 5 PM we have total darkness. Plus, the weather hasn't been all that great. Oh, sure, the weather was fantastic a coupla weeks ago, I know, but then I had something else to do. I think...
However, I shouldn't procrastinate on exercise: I need to keep walking to maintain any semblance of weight maintenance, so I often take the dogs out for a walk after dark for safety reasons. That's the worst part about the season change and deer hunting....for me to go walking is really fool-hardy during the day with the gun hunt on right now. Anything that moves is fair game and I can't push the powers of my Amazingly Protective Blaze Orange Jacket too far. So, even if the weather is nice, I can't put in my road miles because I could get shot. Who says exercise is good for you?
I'll let you know if the blaze orange worked.
Tomorrow.
 |
| Procrastinatoe Fountain, frozen in time. |
Friday, November 19, 2010
How This All Started, Part 14
 |
| January 2004. Winter in the Quarry, the 2nd year. |
We had another garden club scheduled to tour in June 2004, and our niece's wedding was the day after the garden walk. Since it was very cold out, we had ample time to dream up more goofy projects. With all of these events planned (ok, only two events, but for us, that's a big deal) we wanted to add something to the Formal/Rock Garden so people wouldn't be disappointed.
The Formal/Rock Garden was the second garden we had built way back in the day, and no, we didn't know what we were doing. We had sort of copied the idea from a prominent art center's Sunken English Garden. Their garden was rectangular, with flat limestone lining the walls, so I guess we copied the idea rather loosely, but at least it was sunken. A little.
My, it did look pitiful in the beginning...
 |
| The Rock Garden 1988 |
 |
| Same garden maybe around 1990-something Blah-looking. |
 |
| Joel and the former Formal Garden Pond, around 1994---can you see the tiny Dwarf Alberta Spruces around the pond? |
One day I happened to come across an image of Thomas Kinkade's 'Pools of Serenity' and the gazebo in the painting just stopped me in my tracks. This was the kind of structure we needed in the Formal Garden. ( I would have added the picture here, but I believe it's copyrighted...)
I don't know if I've even mentioned this before, but Carl works full-time as a metal fabricator for a mid-sized company about fifteen miles from home. He's been at the same job for the past 34 years, starting at age 18. Since he grew up a blacksmith's son, working with metal comes naturally to him.
Carl looked at the picture and agreed it was a possibility. He could make the gazebo out of wrought iron curls, just like the painting, but when we thought about it, we decided it would be nicer to have a covered structure instead. When we worked in the Formal garden on a hot summer's day, there was no shade and very little air circulation as the spruce trees planted in a semi-circle around the garden block breezes. If we made our structure with a solid roof, we'd have some shade and even shelter from the rain. (We weren't sure what to call the structure, some people referred to them as gazebos, or belvederes or domes...we have sort of settled on 'the dome' lately.)
But what should we make the dome out of? While mild steel would be ok, it would rust eventually. Copper was our first choice for durability and beauty. Carl's dad had frequented steel recycling centers for years and said that sometimes the recycling centers obtain all sorts of things. Carl asked him to keep a lookout for scrap copper sheet metal, and by February, 2004, he hit the jackpot. We were the proud owners of several sheets of copper. (Luckily, at the time, copper hadn't hit the all-time high price for scrap metals, or nobody could have afforded it.) Carl's folks decided to give us the copper for Christmas, and we were so appreciative. What a great gift!
So, in February, Carl set to work making the framework for the new garden structure There's the aluminum framework for the dome, below, on our little trailer:
 |
| Dome Framework after Carl welded it up. February 2004 |
 |
| Look at how SHINY the copper was! Here it is cut and bent to shape and awaiting soldering. |
I wish I could say the soldering went smoothly, without a hitch, but it didn't. We battled on for days with this project. Carl used a hand held propane torch which was rather cumbersome to hang onto, especially when soldering these long, long seams. He would start out by rotating the copper piece's seams to rest up against the dome framework underneath, so he had something to support the copper when it was pressed down.
Then he would begin tacking the seams together in increments six or seven inches apart. He couldn't hold the copper together with anything like a vise grip or clamp, so Joel and I would take turns pressing down on the two pieces to be joined with a piece of steel rod so the two pieces of copper to be joined would be touching before the solder melted. We had to hold the solder joint in place until the solder tack cooled and hardened and then we could move on to the next spot. Then, way too often, as we'd move down the sheet to the floor, we'd find we were off center, so we'd have to untack all the seams again by melting them open and start over, carefully removing the old solder joints by hand. It was a hassle, to say the least. We lost count of how many times we removed all of the solder tacks and started over.
Carl's mom joked several times that since it didn't seem to be working out, at least he could take the copper back to the scrapyard and get his money back if he recycled it again, but Optimistic Carl persevered. I knew he could do it. I may be the pessimist in this marriage, but I have faith in Carl's abilities.
After two and a half weeks of soldering after work and on weekends, we had the dome solid enough to move back home and out of Carl's dad's shop.
 |
| Carl and Joel, soldering on the top cap of the dome, March 2004 |
 |
| Copper dome, soldering completed, March 2004. |


Joel, 18 yrs old, decided to see how strong the construction was after the soldering.
Now we had the dome complete and ready to install in the Formal Garden. But what would it stand on? We had been giving this a lot of thought. Fancy pillars would be wonderful, but....well, once again, the budget came into play. Or, I guess I should say, lack thereof.
Since we had such good luck in the past at Arnie's scrapyard, finding both the wrecker and the windmill, we went back over there to see what he had lying around. Carl was thinking maybe he'd have some beams or something, you never know until you see it. Carl has all sorts of 'things' lying around here, too, but nothing fit the dome's character. We needed to find a fresh pile of 'things'. As luck would have it, Arnie did have something we could use; some five inch pipe just sitting in a pile in the woods, waiting for a dome to come along. The pipe was originally from a now-defunct department store's fire protection/sprinkler system and Arnie was willing to sell us six of them which were about 12' long. For under $100, the Dome had pillars.
(On another sad note: Arnie passed away shortly after we put the windmill head up. I had sent him a card with a picture of his windmill on the tower, thanking him for selling it to me and invited him to stop in anytime to visit. He never did as he was not well, but I hope he knew how much we appreciated his help.)
 |
| The 'pillars-to-be' at our house, getting their tops, bottoms and braces welded in. |
Carl had to make some caps for the pipe to keep water from getting inside and also had to create a way to attach the dome itself to the top of the pipe/pillars.
 |
| April 2004 |
 |
| Carl and Dave trying to level the pipes in the ground--you can barely see the metal bracing between the pillars. The bracing would be buried. |
 |
| David, seated, Carl and Joel, working on putting the Dome legs up. May 2004. In the background, you can see the windmill tower. |
 |
| We had barely enough room to put the Dome where the old pond used to be, and tried very hard not to disturb the wind-burned Dwarf Alberta spruce trees too much. May 2004. |
There were spray-on lacquers we could apply too, to keep the Dome sealed, but if the lacquer would fail in even one, tiny spot, the tarnish would spread under the lacquer eventually, leaving an uneven finish. And the thought of trying to remove a dome-full of lacquer didn't appeal to us, either.
If we couldn't have a beautiful, shiny dome, we hoped the copper would at least patina to a nice verdigris green color. We looked into various chemicals that would hasten the patination process, but got scared when we read about their toxicity....I think cuprous chloride hydrochloric acid was one I read about, but wowza, we'd need a lot of gallons of it, and there's a lot of details to follow and I wasn't sure I wanted to take a chance on messing the entire thing up or polluting the ground, either.
Then I read another article on 'How To Turn Copper Green', but we didn't use that method either. What is it, you may ask? Well, the author was part of a construction crew and they were installing copper flashing and roofing materials on a high-end house. The homeowner said he disliked the bright copper color and wanted it green. The construction boss told the homeowner not to worry as he had a solution. The boss took matters into his own hands, so to speak, and ordered every guy on the crew to pee into a five gallon pail during the day until they had enough 'solution' to pour over the copper. Apparently, it worked, I guess the copper turned green! Hmmmmmmmm...........I wonder if he told the homeowner? Somehow, I doubt it. (And no, we didn't pee on the Dome, we decided we would just wait for a natural patina over time.)
The June deadline for the garden walk and wedding was approaching fast. We had less than two days to go. I gave the Dome one last polish and we loaded it up onto the trailer and the old Murray lawnmower towed it to the Formal garden. (Oh, I wish it could have stayed that color!)
 | ||||
| Dome on trailer, awaiting installation. Joel is in background by the pillars, early June 2004. |
Carl rigged up some two by fours and other wooden braces and put them across the pillars.
 |
| Joel & Carl, installing wooden braces on top of the pillars...the dome is in the background, sitting on the trailer. |
 |
| June 2004 |
We were all uneasy again, the thought of dropping the dome was not a pleasant one. Finally we'd done all we could to get ready, it was time to give it a try.
 | ||||
| Carl and Joel carrying the dome down the steps to the pillars. |
 |
| Everybody ready?? |

 |
| All of us lifting...see my face on the low side, both Joel and I were squished. |
As Carl went up the ladder, Joel and I ended up almost on our knees as the bottom side of the dome was tilted lower and lower to the ground. Our faces were literally 'smooshed' into the dome's surface as it went up. We couldn't figure out why it tarnished there first until we thought about it and realized we'd left our face-prints on the copper! Carl had to lift the dome up over his head and get it steadied on the two by fours before we could all shift positions and get the bottom side of the dome up in the air and carefully set the entire structure on top of its pillars. It was a Major Relief when we had it up there! We made it one try with no human injuries and no dented copper.
 | ||||
| Joel moving ladder, Carl (in shadow) getting ready to remove the braces. |
After we had the dome secured to the pillars, we took a well-deserved break. Then we realized we needed a floor in the dome. We had thought about installing flat limestone pavers, or pouring a cement floor, but then we remembered seeing some cobblestone circular pavers at a home and garden show. We went to a brickyard, found just the right ones and the Mighty Buick ended up towing another very heavy ton home again. We installed the little cobblestones after some trial and error, but the floor turned out very well. (We still have problems with the frost raising the floor every winter though, and have to come up with a fix next spring.) The two steps are marble we found in the local dump and had lying around...they fit the dome very well.
 |
| Teddy Dog and the Dome floor |
 |
| Garden Visitors by the Formal Garden and the Quarry, June 2004 |
After the garden walk, the next day was our niece's wedding, the first wedding to ever have pictures taken here. We were so honored!
 |
| The Wedding |
 |
| Starting to tarnish..June 2004 |
 |
| The Dome June 2010 (No, it's still not green!) |
 | ||||
| A rare sighting of the two of us just before the wedding--2004 (we have tarnished quite a bit too....sigh!) |
Ok, that's it for the Dome installation.
I guess I should add this disclaimer to all of my posts lately:
"The stunts you see depicted here were performed by People in Serious Need of Mental Health Checkups. Do NOT try this at home!"
P.S. I'm linking to Tootsie's Fertilizer Friday and Kitchen Bouquet Flashback Friday too...it's a retro-flashback...and I think there's some flowers in here somewhere.
Subscribe to:
Posts (Atom)