Ok, back to the poinsettia saga. Over the last two weeks, I spent quite a of bit of time studying the repeats of the poinsettia in the living room window for color comparisons and critique. Our two dogs, Teddy (the white one) and Pudding (the gray one) watch from their perch on the couch as their crazy mistress crawls around on the floor with a camera trying to get a good camera angle without too much sun glare.
This is the first repeat, nearly done.
Joel is lining up the mylar pattern in this picture.
We would remove the mylar from time to time to check for color.
Then we moved on to the second repeat, shown here, partially done. Carl was given a large, clear glass patio tabletop from someone at work which worked great for viewing both repeats together. After another few days, we had the two repeats nearly complete. I needed to compare the two sections of the shade in different lighting to see what worked and what didn't. Then I set to work foiling the entire lamp which took me the better part of a week.
I took a great many closeups of the shade at this point because I find lamps to be as beautiful (sometimes even more so, because you can see them all at once) in the flat as they are in their finished form.
In this picture, I tried to get a profile of the glass with the sun shining through. This picture doesn't show the true beauty of the amazing blue Uroboros background glass which has several stunning colors blended throughout the sheet.
As I stated in an earlier post, the poinsettia pattern was graciously loaned to us from our friend, Bonnie, who had a wooden form custom-made for the pattern. Bonnie sent us the pattern which was a tremendous help to us! Carl opted to make his own form out of sheet metal after doing a bunch of mathematical equations. Here is the resulting form below:
We made an additional copy of the pattern and covered it in clear Contac paper. Then we applied the pattern to the metal form by coating the metal with glue sticks.
The next step is to apply the glass to the form. Here I am using a small crockpot (guess I'll have to get another one to cook with) to melt the Tacky Wax. This time, we decided to individually 'paint' the wax on the back of each piece of glass. Normally we would have waxed the entire form with a thin layer of wax, but since we're dealing with Contac Paper, we didn't want to take a chance on getting it too hot. Another method we use is putting small balls of Tacky Wax on the back of each piece of glass which works very well, too.
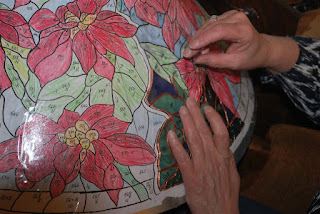
We're still working on fine-tuning the placement as of this past weekend.
More to come on this!


1 comment:
I think you're in the big leagues now!! This is spectacular and I can't wait to see it finished.... just amazing! L
Post a Comment